
A crumbling concrete foundation is more than an eyesore; it’s a warning sign that demands your attention. Whether you’ve noticed small flakes or large chunks breaking away, understanding how to repair concrete foundation crumbling is essential for protecting your home’s structural integrity and value. This comprehensive guide will walk you through the causes, identification, and step-by-step solutions—from simple DIY patches to major professional repairs ensuring you can make informed decisions to secure your home’s foundation.
Understanding Foundation Crumbling and Spalling
Foundation spalling, often called crumbling, is the process where the concrete surface flakes, peels, or breaks away. It starts small but can escalate, exposing the reinforcing steel to moisture and corrosion.
What Causes Concrete Foundation Deterioration?
Several factors lead to foundation deterioration. The most common is water intrusion. When water seeps into concrete and freezes, it expands, creating internal pressure that cracks and spalls the surface. This freeze-thaw concrete damage is a major culprit in colder climates. Other causes include:
- Poor installation: Incorrect water-to-cement ratio or inadequate curing during original construction.
- Chemical corrosion: Road salt or certain soils can attack concrete. A specific issue is pyrrhotite concrete deterioration, where a mineral in the aggregate causes internal swelling.
- Soil pressure: Soil expansion and settlement exert immense pressure on basement walls, leading to cracking and spalling.
- Age: Simply put, all concrete deteriorates over time.
Signs of Foundation Damage and Spalling
Early detection is key. Look for these signs of foundation damage:
- Flaking or peeling concrete surfaces
- Visible cracks, especially horizontal ones in basement walls
- Crumbling around joints or edges
- Rust stains, indicating rebar corrosion
- Efflorescence removal concrete reveals a white, powdery residue left by evaporating water
- Bowing or inward-leaning basement walls
Assessing Severity: Surface vs. Structural Damage
Not all damage is equal. Surface damage is cosmetic, involving spalling only on the outer inch of concrete. Structural damage affects the foundation’s load-bearing capacity, indicated by wide, spreading cracks, significant wall bowing, or uneven floors. A good rule: if a crack is wider than 1/4 inch or is growing, it’s likely structural.
Common Problem Areas: Basement Walls and Garage Foundations
Basement wall crumbling repair is frequent due to constant hydrostatic pressure and moisture. Garage foundation crumbling fix projects are also common, as garage slabs are often thinner and exposed to de-icing salts and weather extremes.
Safety First: Essential Preparations Before Starting Repairs
Foundation work can be hazardous. Proper preparation is non-negotiable.
Required Safety Gear and Protective Equipment
Always wear safety glasses, a heavy-duty respirator (for concrete dust), thick gloves, and steel-toe boots. Hearing protection is necessary when using power tools.
When to Consult a Structural Engineer
Before any DIY repair, conduct a structural integrity evaluation. Consult a structural engineer if you see: horizontal cracks, cracks wider than 1/4 inch, stair-step cracks in masonry, doors/windows that stick, or sloping floors. Their assessment can save you from costly, ineffective repairs.
Building Permit Requirements for Foundation Work
Most localities require a building permit for foundation repair that involves structural work, underpinning techniques, or changes to the footprint. Always check with your local building department.
Creating a Safe and Accessible Work Environment
Ensure the area is well-lit and ventilated. Remove all debris and secure any overhead hazards. Use sturdy ladders or scaffolding for high areas.
Tools and Materials Needed for Foundation Repair
Having the right tools makes the job efficient and effective.
Essential Hand Tools for Concrete Removal and Preparation
- Cold chisel and engineer’s hammer for chisel and hammer concrete removal
- Wire brush foundation cleaning
- Stiff bristle brush
- Trowels (pointing and finishing)
- Margin trowel
Power Tools for Efficient Surface Preparation
- Rotary hammer with a chipping bit (for larger areas)
- Angle grinder with a masonry wheel
- Pressure washing concrete surface (after chiseling, to remove all dust)
Repair Materials: Hydraulic Cement, Epoxy, and Polyurethane Foam
- Hydraulic cement foundation repair: Expands as it sets, ideal for plugging active leaks.
- Foundation crack repair epoxy: A high-strength adhesive for bonding cracked walls.
- Polyurethane foam foundation repair: Flexible, waterproof foam injected to fill voids and stop water.
Concrete Bonding Agents and Reinforcement Materials
A concrete bonding agent application is crucial for ensuring new material adheres to old concrete. For structural cracks, carbon fiber strips reinforcement or wall anchors for foundation may be needed.
Mixing and Application Equipment
Mixing buckets, drill with paddle mixer, caulk gun for epoxy or foam, and injection ports for crack repairs.
Step-by-Step Guide to Repairing Crumbling Concrete Foundation
Here is the core DIY concrete foundation repair process for typical spalling.
Step 1: Removing Loose and Damaged Concrete
Use a hammer and chisel or rotary hammer to remove all loose, crumbling concrete. Chip back to solid, sound material. Undercut the edges slightly so the repair area is wider at the back this helps lock the patch in place.
Step 2: Cleaning and Preparing the Repair Surface
Thoroughly clean the area with a wire brush foundation cleaning. Then, pressure washing concrete surface is ideal to remove all dust and debris. The surface must be clean, sound, and damp (but not dripping wet) before proceeding.
Step 3: Applying Concrete Bonding Agent Correctly
Follow the manufacturer’s instructions. Typically, you apply a liquid bonding agent to the old concrete with a brush. It creates a sticky, glue-like layer that ensures a strong bond with the new patching material.
Step 4: Mixing and Applying Hydraulic Cement or Repair Mortar
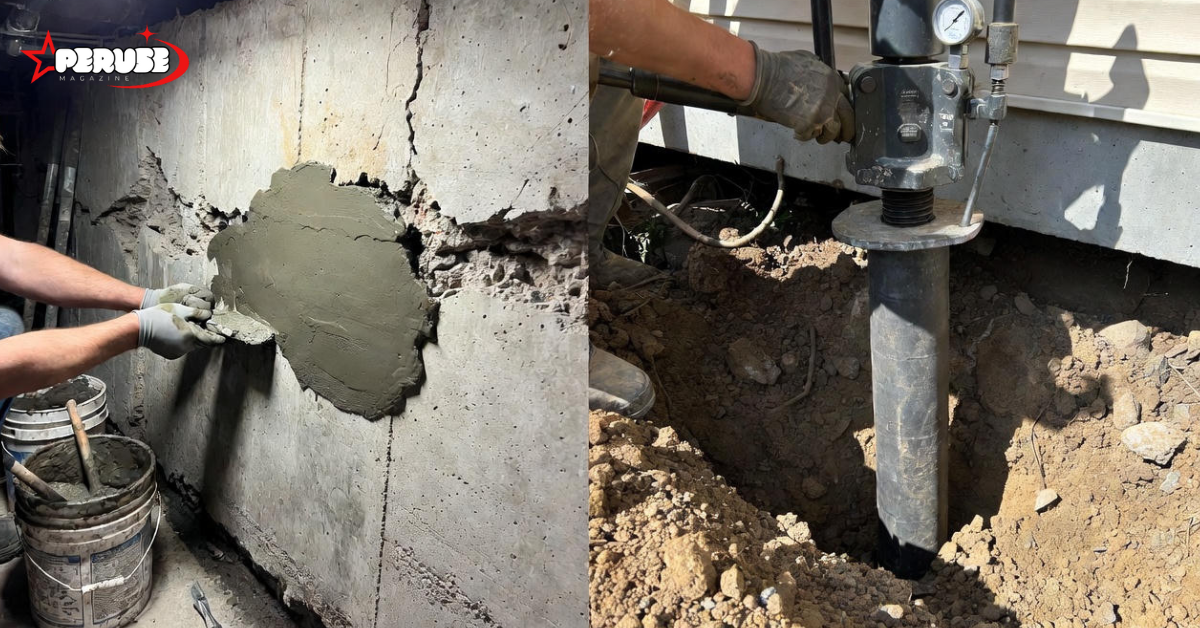
Mix your hydraulic cement or pre-bagged repair mortar to a stiff, putty-like consistency. Using a trowel, press the material firmly into the repair cavity. Overfill it slightly.
Step 5: Finishing and Smoothing the Repair Area
Once the patch begins to stiffen, use a finishing trowel to smooth it flush with the surrounding surface. You can texture it with a brush to match.
Step 6: Proper Curing Techniques for Long-Lasting Results
Curing is critical. Keep the patch moist for several days by misting it and covering it with plastic sheeting. This allows it to gain full strength and prevents cracking.
Alternative Repair Methods for Different Foundation Issues
Not all problems are solved with patching. Here are other concrete foundation repair methods.
Epoxy Injection Repair for Foundation Cracks
For non-moving structural cracks, epoxy injection foundation repair is used. It involves sealing the crack surface and injecting high-strength epoxy under pressure, bonding the walls back together.
Polyurethane Foam Injection for Void Filling and Water Stops
Flexible polyurethane foam is injected to fill voids under slabs or behind walls. It’s also the best method for creating a permanent, flexible water stop in leaking cracks.
Carbon Fiber Reinforcement for Structural Crack Stabilization
Carbon fiber strips reinforcement involves bonding incredibly strong carbon fiber strips over stabilized cracks or bowed walls. They act like permanent steel braces without intruding into space.
Foundation Underpinning with Steel Push Piers and Helical Piers
For settling foundations, foundation underpinning techniques transfer the home’s weight to stable soil deep underground. Steel pier foundation repair (push piers) and helical pier installation are the two most common professional systems.
Slabjacking vs. Mudjacking for Sunken Foundation Sections
Both lift sunken concrete slabs by pumping material underneath. Slabjacking uses a high-density cement slurry. Mudjacking uses a limestone mix. Slabjacking vs mudjacking often comes down to the material used and local contractor preference.
Repairing Specific Foundation Areas
Basement Wall Crumbling Repair Techniques
For basement wall crumbling repair, interior patches are often cosmetic. Lasting repair requires addressing the exterior cause: water pressure. This leads to foundation waterproofing solutions and exterior drainage work.
Garage Foundation Crumbling Fix
A garage foundation crumbling fix often involves removing the damaged edge, cleaning, and applying a new concrete form or using a specialized vertical patching compound. Improving drainage away from the slab is crucial.
Concrete Foundation Resurfacing for Extensive Surface Damage
When spalling is widespread but shallow, concrete foundation resurfacing with a bonded overlay or parge coat can restore appearance and protection.
Foundation Repointing and Mortar Joint Repair
In block foundations, deteriorating mortar must be addressed via foundation repointing mortar. Old mortar is chiseled out and fresh mortar (often a lime mortar vs cement mortar blend for flexibility) is packed in.
Preventing Future Concrete Foundation Crumbling
Repair is only half the battle. Prevention is key.
Improving Foundation Drainage Systems
This is the #1 preventative step. Ensure gutters are clean and downspouts extend at least 6 feet away. Consider installing French drains or swales to redirect water.
Waterproofing Solutions for Foundation Protection
Exterior membrane waterproofing or interior drain tile systems manage water intrusion foundation damage at its source.
Controlling Water Intrusion and Moisture Levels
Use a dehumidifier in basements. Grade soil around your home to slope away from the foundation (6 inches over 10 feet is standard).
Seasonal Foundation Maintenance and Inspection Checklist
Perform a bi-annual foundation inspection checklist: look for new cracks, signs of moisture, and ensure drainage paths are clear.
Addressing Freeze-Thaw Concrete Damage
Seal concrete with a quality penetrating sealer to reduce water absorption. Avoid using harsh de-icing salts near foundation concrete.
DIY vs. Professional Foundation Repair: Making the Right Choice
When DIY Concrete Foundation Repair Is Safe and Appropriate
DIY is suitable for minor, non-structural concrete foundation patching techniques and efflorescence removal. If the damage is cosmetic, confined to a small area, and you’re confident in the cause, you can proceed.
Warning Signs That Require Professional Foundation Repair
Call a pro for: any horizontal cracking, cracks that are widening, bowing walls, sinking foundation sections, or if you’ve tried patching but the problem returns. These indicate ongoing structural integrity evaluation is needed.
How to Vet and Select Foundation Repair Contractors
Look for licensed, insured companies with strong local reputations. Ask for references, multiple quotes, and details on their proposed method (e.g., push piers installation, carbon fiber, etc.). Ensure they handle building permit foundation repair processes.
Understanding Foundation Repair Warranties and Guarantees
A reputable contractor will offer a transferable warranty covering both materials and labor. Understand what it covers (often the repair itself, not new cracks) and for how long.
Cost Breakdown and Budgeting for Foundation Repairs
DIY Foundation Repair Material Costs Estimates
A DIY patch kit or bag of hydraulic cement costs $20-$50. Epoxy injection kits range from $100-$300. Carbon fiber strips reinforcement DIY kits can cost $300-$600 for a small area.
Professional Foundation Repair Cost Factors
Costs vary wildly based on method and severity. Patching may cost a few hundred dollars. Wall anchors for foundation can be $1,000-$1,500 per anchor. Steel pier foundation repair often ranges from $1,000 to $3,000 per pier, with most homes needing 8-10 piers. Full foundation replacement cost can exceed $40,000.
Money-Saving Tips Without Compromising Quality
Get multiple quotes. Address water issues immediately to prevent escalation. Consider combining repairs (e.g., waterproofing during underpinning). Some preventative maintenance is DIY-friendly.
Building Codes, Permits, and Legal Considerations
When Building Permits Are Required for Foundation Work
Permits are typically required for any work that alters the structure’s load-bearing components—this includes underpinning, installing piers, or major crack repairs. Simple patching usually doesn’t require one.
How to Navigate the Permit Application Process
Your contractor usually handles this. If DIY, contact your local building department. They will require detailed plans of the proposed repair for review.
Post-Repair Inspection Requirements
After permitted work, a municipal inspector will visit to ensure the repair meets local building codes. This protects you and ensures future home sale transparency.
Documentation for Home Insurance and Resale Value
Keep all records: engineer’s report, contractor contracts, permits, inspection approvals, and warranty documents. This proves the work was done properly and is vital for insurance claims and resale.
Conclusion: Key Takeaways for Successful Foundation Repair
Fixing deteriorating concrete foundation issues is a manageable process with the right knowledge. Start by accurately assessing the damage—don’t ignore the signs. Safety and proper preparation are paramount. For minor spalling, concrete foundation patching techniques can be a successful DIY project. However, never hesitate to invest in a professional assessment for anything beyond surface-level. Remember, the ultimate goal is not just to patch a hole, but to solve the underlying problem, whether it’s water, soil, or age. By taking a systematic approach, you can restore your foundation’s strength and ensure your home stands solid for years to come.
Frequently Asked Questions About Repairing Crumbling Concrete Foundations
Q: Can I use regular concrete mix to repair a crumbling foundation?
A: No. Regular concrete mix shrinks as it cures and won’t bond well in thin patches. Always use a product designed for repairs, such as hydraulic cement, vinyl concrete patcher, or an epoxy mortar, which have bonding agents and non-shrink properties built in.
Q: How long does a typical DIY foundation patch last?
A: If the underlying cause (usually water) is fixed and the surface was prepared correctly, a quality patch can last for many years, often 5-10 or more. If the problem returns quickly, it indicates an unresolved moisture or structural issue.
Q: What is the difference between carbon fiber strips and steel beams for wall reinforcement?
A: Steel I-beams are intrusive but handle extreme bowing. Carbon fiber strips reinforcement is non-intrusive, incredibly strong in tension, and is bonded directly to the wall like a permanent band-aid. It’s ideal for stabilizing cracks and moderate bowing without losing floor space.
Q: Is foundation crumbling covered by homeowners insurance?
A: Typically, no. Most standard policies exclude foundation damage caused by soil expansion and settlement, water intrusion, or normal wear and tear. It may be covered if the damage is a direct result of a sudden, named peril like a plumbing burst or an earthquake (with a rider).
Q: How often should I inspect my foundation for early signs of damage?
A: Perform a visual inspection at least twice a year (spring and fall) as part of your foundation maintenance tips. Check the interior and exterior for new cracks, moisture, or changes in existing damage. After major storms or seismic events, an extra check is wise.